How to migrate data from Amazon EFS to Amazon S3 with AWS DataSync
AWS DataSync is a service that simplifies and accelerates data migrations not only to but also from and between AWS storage services. In this blog post we will see step by step how to migrate data from an EFS file system to an Amazon S3 bucket with AWS DataSync.
The AWS DataSync service was first released in November 2018. AWS DataSync introduced fully automated transfers between AWS storage services in November 2020. Thanks to that, we are now able to migrate data between AWS storage services with just a few clicks in the AWS DataSync console.
Before we proceed to the main point, let’s cover some preliminary steps first. For our data migration we need to provide a subnet and a security group. While it is possible to create a new security group for the migration task, we will use the existing security group of the EFS file system and modify it so that it can work with AWS DataSync. Let’s first find out what are the relevant subnet and security group for the EFS file system that we want to use.
We open the EFS service and select the file system whose data we want to migrate. We then open the network tab and write down the first subnet and the first security group for later.
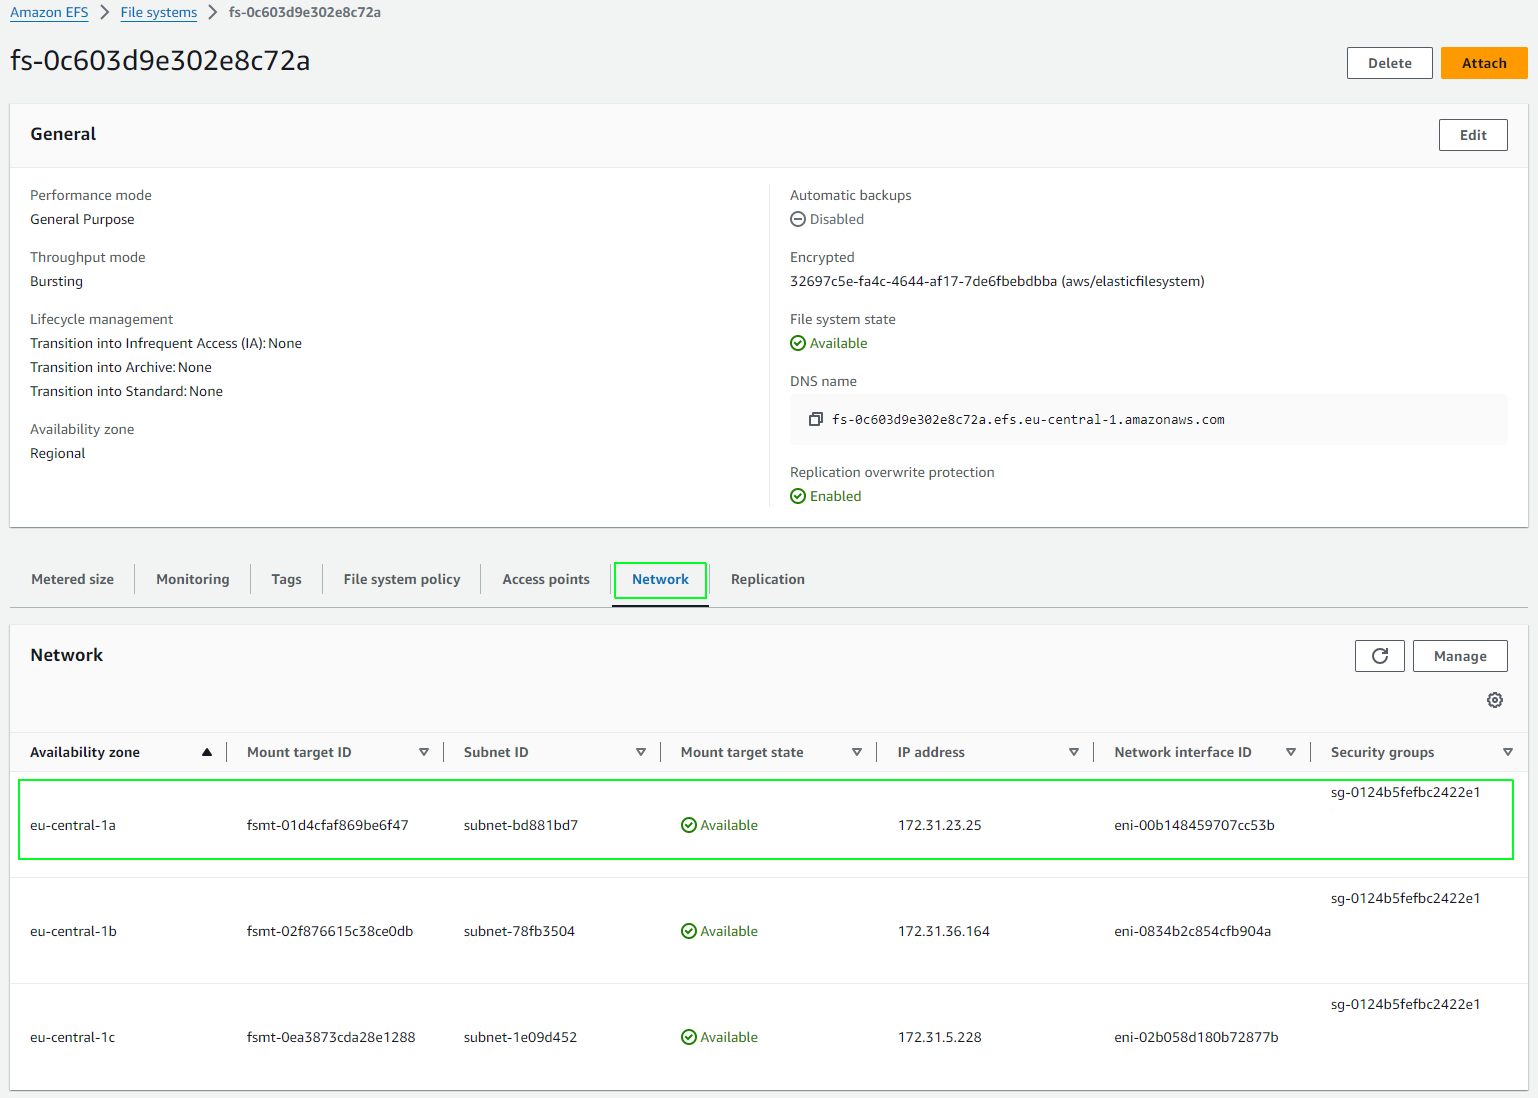
In case the EFS file system is not mounted, we will see something similar to the following image. We have to click on “Create mount target” and first create a mount target for the EFS file system.

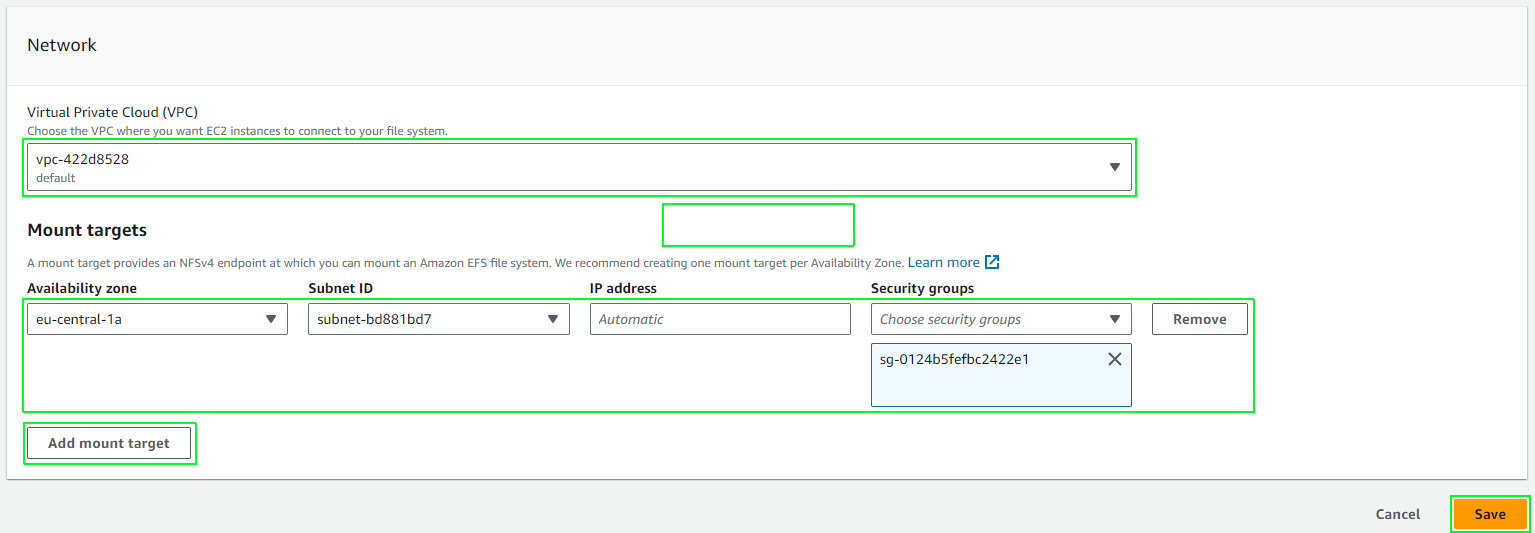
We first select a VPC and then click on “Add mount target” to add a mount target. We proceed to specify an availability zone, a subnet and a security group. EFS expects a security group with inbound traffic on TCP port 2049 and outbound traffic. The security group will later be updated. Upon clicking on save, we are done creating the mount target.
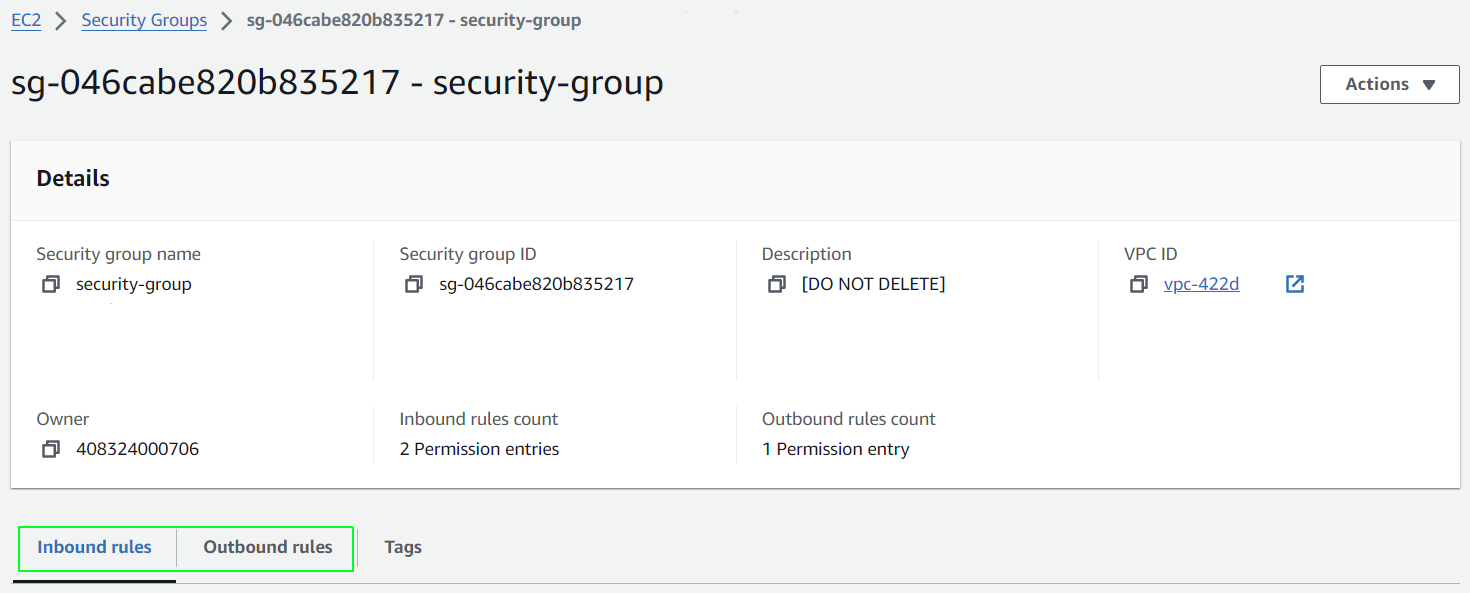
We need to make sure that the AWS DataSync task we are going to create later is able to access the EFS file system and for that, we have to configure the security group to allow inbound traffic from itself on port 2049 as well as all outbound traffic to itself. Note that we may also use an outbound rule that allows traffic to any location.
We use the search function of the AWS management console and search for ‘Security groups’. On the listing page for security groups, we locate the one with the security group id used by the EFS file system at the previous steps. We then add the new inbound and outbound rules.


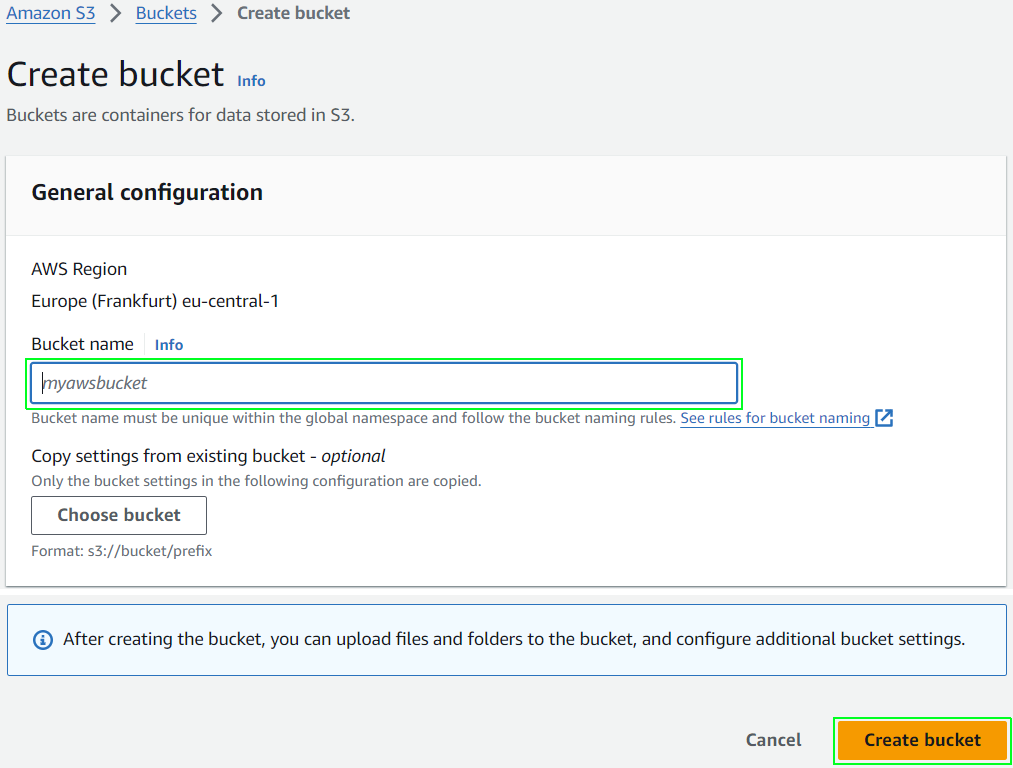
We also have to make sure we have an Amazon S3 bucket to hold the data once the migration is complete. Let’s go ahead and create one. We can find the Amazon S3 service by searching for “S3” in the AWS management console and initiate a bucket creation there.

In the bucket creation page we provide the bucket name and validate the bucket creation.
That’s it for the preparatory steps.
Let’s now get started with AWS DataSync and the migration task. To run a data migration with AWS DataSync we need to create a task. A task is comprised of two locations: A source location where the data is located and a destination location where we want to copy the data. Existing source or destination locations can be reused by multiple tasks.
Let’s begin with the creation of our data migration task.
Open the AWS DataSync service and select the option Transfer data

Then start a new transfer task by clicking on Create task

We first have to create a data source by selecting Create a new location

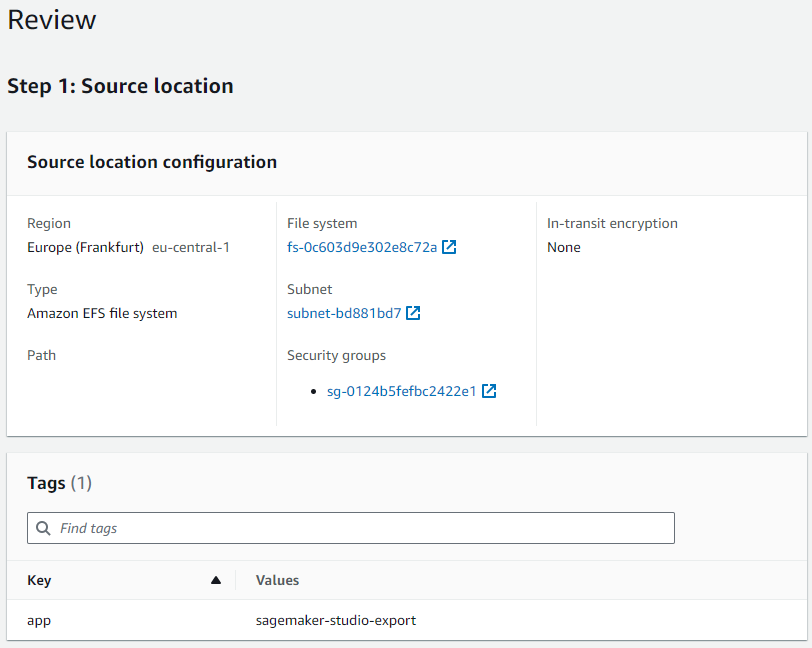
As we want to copy data from Amazon EFS, we set Amazon EFS file system as the location type. We then provide the region in which the file system is located as well as the file system. Since we want to copy all available data from the file system, we won’t provide a mount path. We still have to provide a subnet and a security group. The subnet information for the EFS file system can be found under the file system Network tab in EFS. We will use the first listed subnet as well as the first listed security group. It is, however, possible to add a new security group to the EFS file system to avoid having to modify the existing ones. For this article, we will just use the existing one.
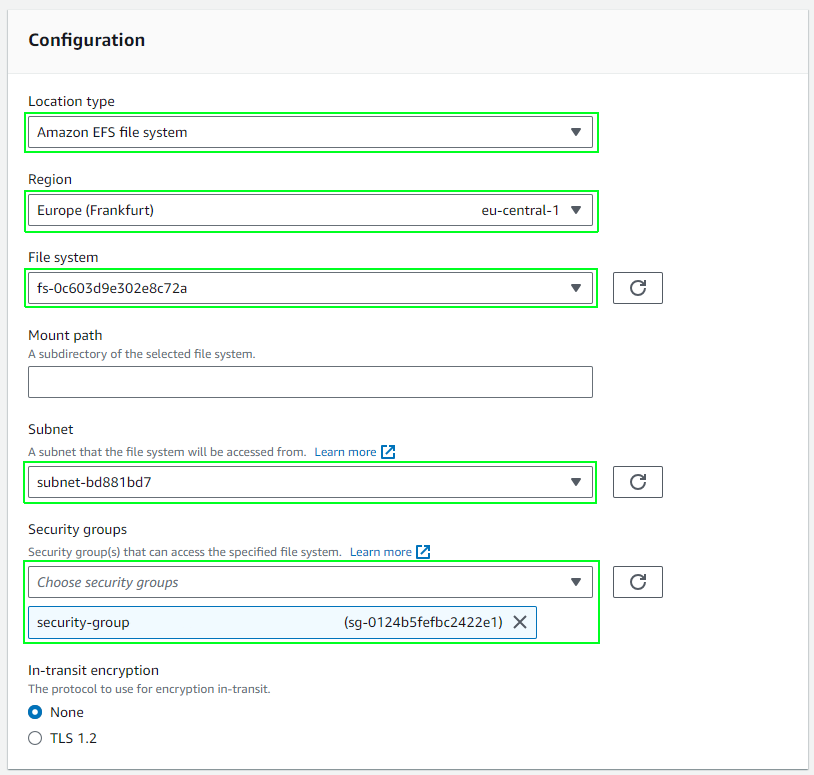
For more security we may have enabled in-transit encryption by selecting TLS 1.2 at the previous step. The new added field in that case could have been left unchanged.
We add tags to our source location.

Since we are done with the source location lets configure the destination location.

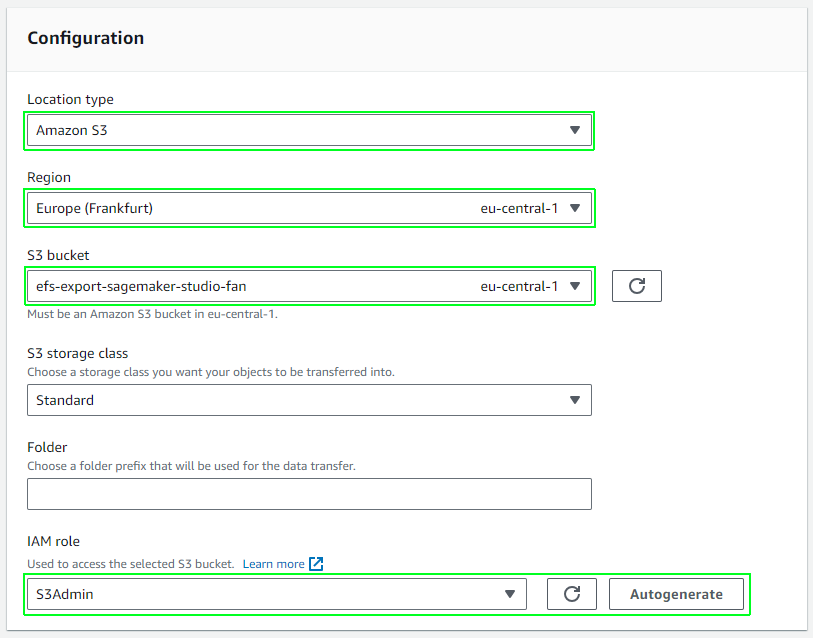
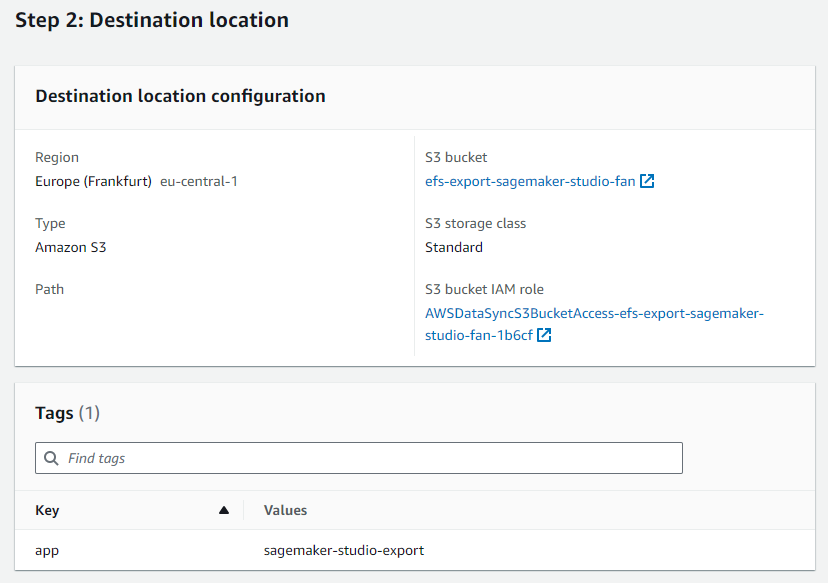
We want to copy the data to Amazon S3, so we select it as the destination. We then choose the region in which our target bucket is located, as well as the target bucket itself. The storage class can be left as “Standard”, and the folder can be left empty. We need to provide an IAM role with the appropriate permissions to put objects into the specified bucket. In case the bucket has a KMS encryption key, the selected IAM role should have the proper KMS permissions to use the said KMS key (kms:GenerateDataKey and kms:Decrypt). It is also possible to let AWS DataSync auto-generate an IAM role—an option to consider if we do not have a readily available role.
We then set tags for our destination location.

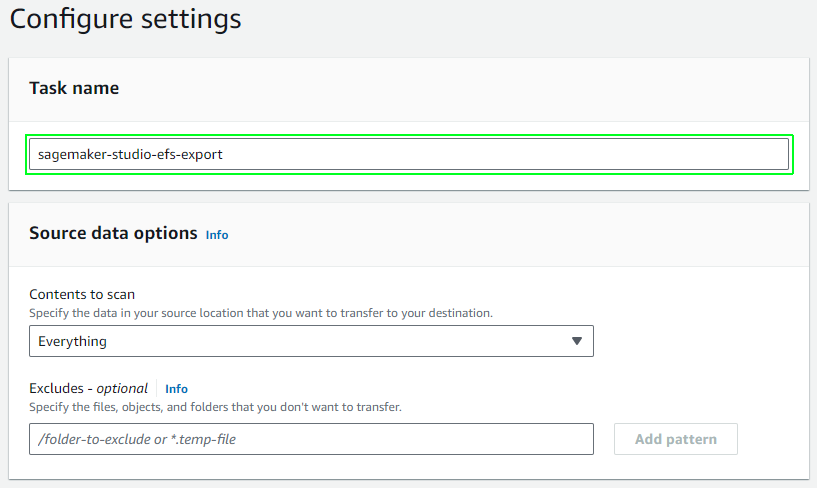
As we have defined both a source location and a destination location, we can now finalize the settings of our data sync task by providing a task name.
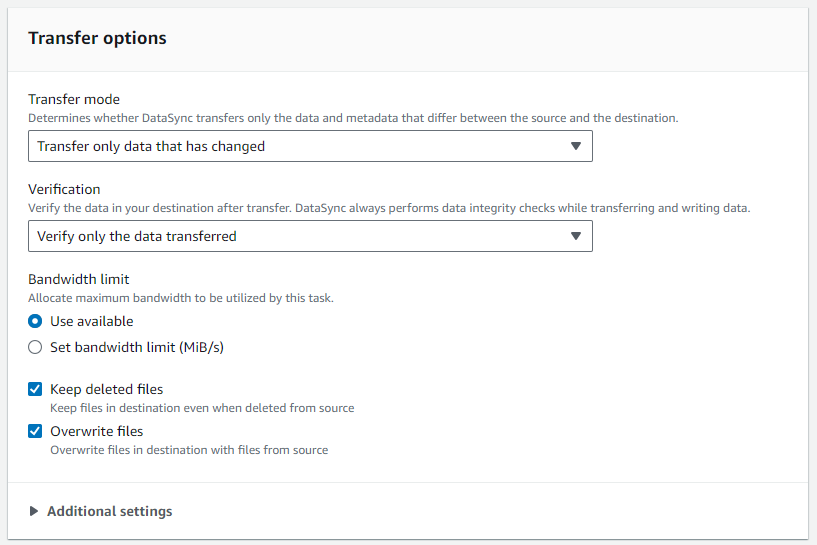
We keep the transfer options unchanged.
We set some tags for our task.
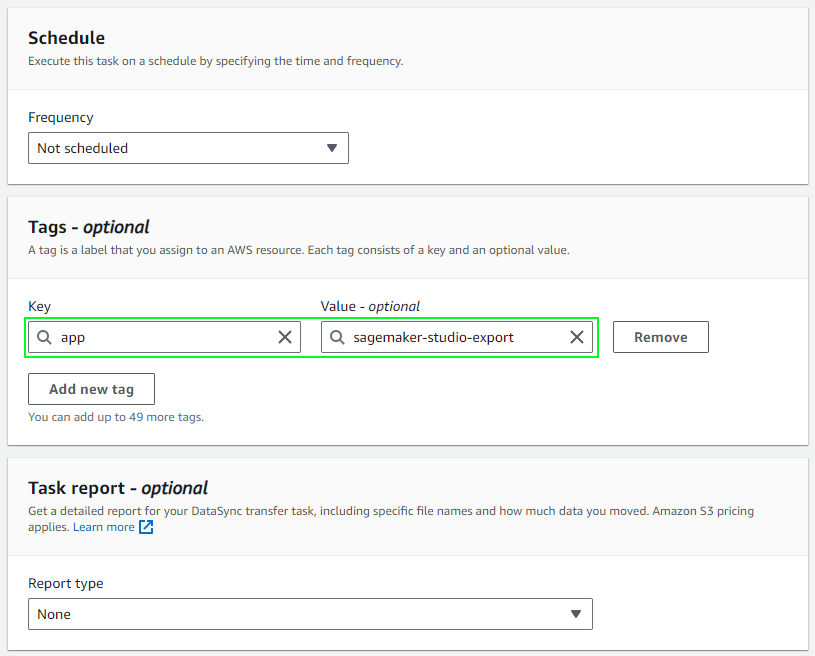
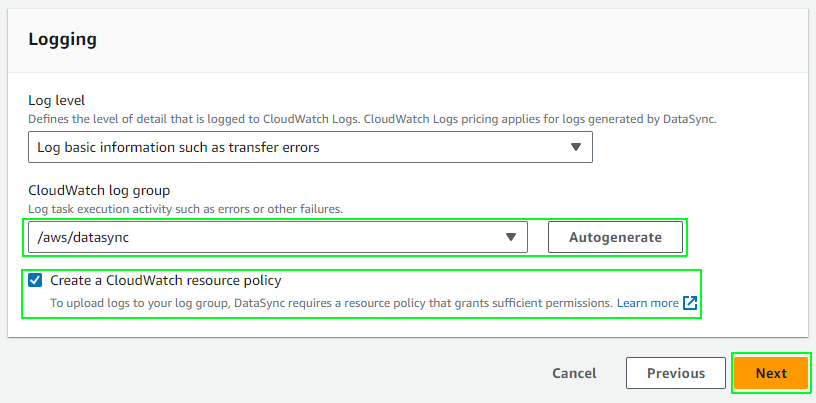
We request the auto generation of a CloudWatch log group and make sure that the box Create a CloudWatch resource policy is checked.
We review our task settings before creating it.
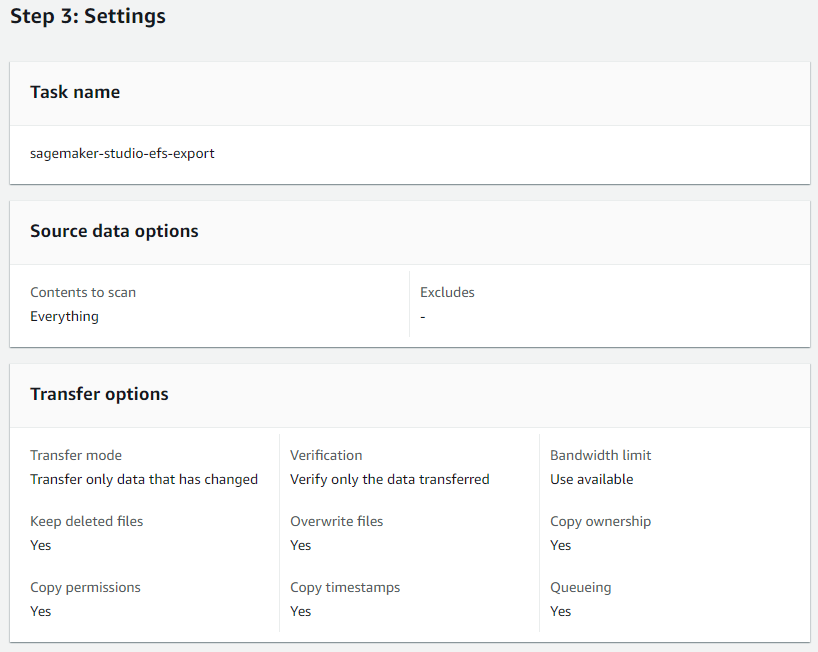
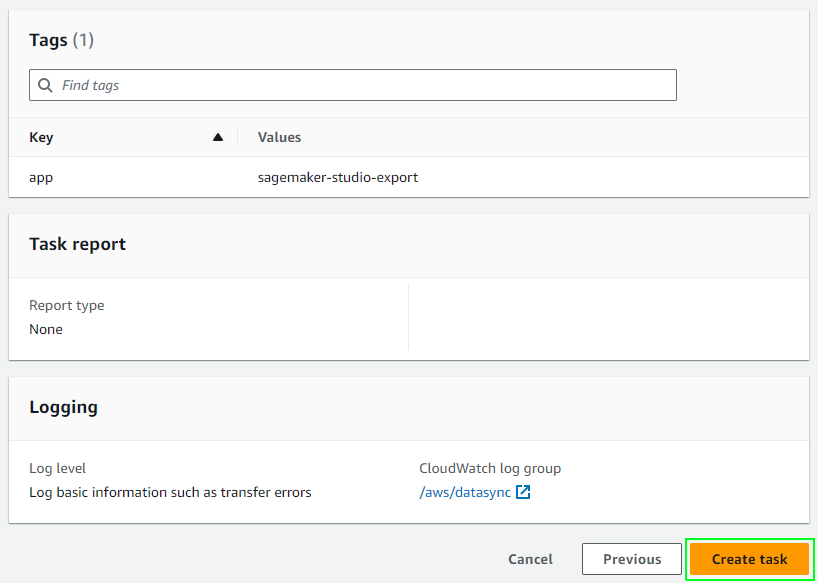
Once the task is created we start an execution.
Et voilà! After a certain period, the task should successfully copy the content from the EFS file system to the selected Amazon S3 bucket.

Summary
AWS DataSync is a very helpful service when it comes to data migration from, to or between AWS services. Without it, we would have needed to first create an EC2 instance, mount the EFS file system, and manually copy the data from the mounted EFS file system to Amazon S3. With AWS DataSync, we could easily achieve our goal and can even configure it to run periodically. I hope this article was helpful. I am always happy to receive comments or feedback.
— Franck
Title Photo by Hunter Harritt on Unsplash
